I was browsing the lighting section of my local Walmart for a smart plug, and I found one. WiFi-enabled connectivity for $20. Was it too good to be true?
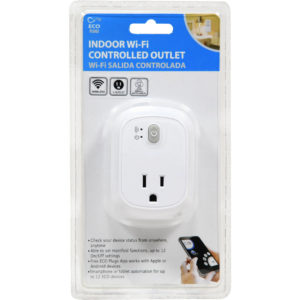
I thought that this was the smart plug that the Wirecutter, a very good editorial website dedicated to testing 1000s of gadgets, suggested as a runner up. When I came home, I was surprised to learn that it was not. The reviews for the ECO Plugs Indoor Wi-fi Controlled Outlet complained how it didn’t work right, and how their tech support was not in English. I got a bit hesitant at my compulsive purchase, but I pressed on to see what it could do.
The app that they guide you to install in the included instruction booklet was a bit rough around the edges, but I was able to get the plug set up with my Alexa speaker without too much hassle (there is a downloadable “skill” for the plug). Unfortunately, my speaker is more of an actual speaker than an Alexa device (I have to press the button to make Alexa do anything), so I needed to have Siri integration.
iOS has an official Apple app called HomeKit, which is the company’s way to integrate “smart devices” in your home with a single app — whether they are light bulbs, light switches, outlets like I had bought, cameras, or any number of other appliances with built in WiFi capabilities.
The ECO Plug device did not support Siri out of the box, and the only way that it could do so would be if it was enabled somehow in HomeKit. I searched online for a solution, and found some software called “HomeBridge”, which you install on your Mac to bridge these basic smart devices with the HomeKit environment.
Installation on a Mac
HomeBridge takes a bit of work to install if you don’t have experience with coding. You’ll have to install node.js on your computer first, by going to the node.js website and running the installer. Open Terminal and then head over to the HomeBridge Github page, and follow the install directions. After running the command and entering in your system password, it should be installed. In the Finder, click on the Go menu and select “Go To Folder”. Type in:
/usr/local/lib/node_modules/homebridge
Now you should be in your HomeBridge install location. Copy the the config-sample.json file in the Finder, and re-select “Go To Folder”. Now go here:
~/.homebridge
Paste the file in this directory, rename it to config.json, and open using Sublime Text 2, Atom editor, or some other coding editor that is not Textedit or Word. Go back to your Terminal window and install the package that someone created for ECO Plugs. Back to your config.json file. Copy the configuration example as shown on that page. In all, the config file should have nothing listed for accessories (just the starting and ending brackets ‘[]’), and the platform code as written. Save the file, and launch HomeBridge in the terminal by simply typing “homebridge”. If it all works, your HomeBridge should be seen by HomeKit, and your socket should be available as an accessory.
From here on out, it is just a matter of knowing how to go through the HomeKit app to set up and manage new devices. The plug should show up as whatever you initially named it as in the ECO Plugs app. I set my socket as a light in HomeKit, which allows Siri to take commands to turn on and off “the bedroom light”. I also have the light go on after sunset and added it to a few scenes.
I changed my sleep settings on my laptop not to turn off the hard drive or fully shut off in sleep mode; HomeBridge barely takes up any system space or uses any processor. However, you can run HomeBridge on a Raspberry Pi, if you’re looking for a stand-alone device. These directions are also probably similar for Windows, but I haven’t tried it out.
If you want to control the plug from outside your home, you will need to install an Apple TV on your home network (minimum 4th generation). If you’re in the market for a device like this, (a Chomecast, a Roku, Fire Stick, etc.), it may be worth looking into. However, you can always use the ECO Plugs app, or set up an always-at-home iPad to act as a hub.
Alexa integration still worked, but it only recognized commands in terms of the smart plug’s name, such as “turn off the bedroom”. There was no way that I could find to change the type of device as HomeKit had allowed. I became even more impressed with HomeKit; I found that they had extended iOS 11 support, in that you could now swipe up to go to control center and see all of your devices within a few taps.
I will probably migrate to a Raspberry Pi in the future (for other projects), so it will be used as a dedicated HomeBridge system some day. I may go in the Apple TV direction eventually as well, since it seems to play well with my other Apple devices, and the hub feature would be a good thing to have on the side. But for now, this $20 smart plug is absolutely worth the purchase, and integrates well with Siri after a few hacks. For that cost, you can’t beat it.